Showing posts with label How to...... Show all posts

Thursday, May 7, 2009

Changing the Windows Boot Screen with...


Changing the Windows Boot Screen
Now you can Change your Boot Screen with the Beautiful Picture of Khmer Style
Safely and easily change your Windows boot screen with Boot Skin. It allows you to replace your Windows boot up screen with ones you can download from This Blog

NL
src="http://pagead2.googlesyndication.com/pagead/show_ads.js">


<


Read more!

Page Navigation Hack for Blogger


Most said page navigation menu in the bottom of the page can appear only in Wordpress blogs. But Now here is a blogger hack which will help you to show Page Navigation Menu in bottom of the page ( see screenshot ) . you can Add this Page Navigation hack to your blogger template either by inserting script to your template by editing or you can add it as a widget . In this post I will write only how to add this Page navigation menu by editing template code.


I have used a background image for this Page Navigation hack. If you want to show this without the background image just remove the background image url .

Let us start :
Step
1

: Log in to your blogger account and navigate to Layout section. Now go to the edit HTML subtab.

Step
2

: search this line ]]></b:skin> and add this CSS code above that line.

CSS CODE WITH IMAGE :

.showpageArea {padding: 10px; color:#003366;text-align:left;width:530px;
}
.showpageArea a {float:left;
background:url(http://i263.photobucket.com/albums/ii150/mohamedrias/backbutton.gif) no-repeat 0 0;
text-align:center;width:127px;
height:42px;
text-align:center;
display:block;margin:0 5px;
color:#333;
padding-top:6px;
}
.showpageArea a:hover {
color:#333;
margin:0 5px;
padding-top:6px;
}
.showpageNum a {background:url(http://i263.photobucket.com/albums/ii150/mohamedrias/page_num.gif) no-repeat 0 0;
width:37px;
height:42px;
display:block;
text-align:center;
float:left;
margin:0 5px;
padding-top:6px;
text-decoration:none;
color:#333;
}
.showpageNum a:hover { background:url(http://i263.photobucket.com/albums/ii150/mohamedrias/page_num.gif) no-repeat 0 100%;
color:#FFF;
}
.showpagePoint {background:url(http://i263.photobucket.com/albums/ii150/mohamedrias/page_num.gif) no-repeat 0 100%;
width:37px;
height:42px;
display:block;
float:left;
text-align:center;
margin:0 5px;
padding-top:6px;
font-weight:bold;
color:#FFF;
}
.showpage a {
}
.showpage a:hover {
}
.showpageNum a:link,.showpage a:link {
text-decoration:none;
color:#cc0000;
}

It must look like this :


Step
3

: Now search for this code or related in your template ( no need to expand widgets )

<b:section class='main' id='main' showaddelement='yes'>
<b:widget id='Blog1' locked='true' title='Blog Posts' type='Blog'/>
</b:section>


Now Add This script just below the </b:section> .
&lt;script type=&quot;text/javascript&quot;&gt;

function showpageCount(json) {
var thisUrl = location.href;
var htmlMap = new Array();
var isFirstPage = thisUrl.substring(thisUrl.length-14,thisUrl.length)==&quot;.blogspot.com/&quot;;
var isLablePage = thisUrl.indexOf(&quot;/search/label/&quot;)!=-1;
var isPage = thisUrl.indexOf(&quot;/search?updated&quot;)!=-1;
var thisLable = isLablePage ? thisUrl.substr(thisUrl.indexOf(&quot;/search/label/&quot;)+14,thisUrl.length) : &quot;&quot;;
thisLable = thisLable.indexOf(&quot;?&quot;)!=-1 ? thisLable.substr(0,thisLable.indexOf(&quot;?&quot;)) : thisLable;
var thisNum = 1;
var postNum=1;
var itemCount = 0;
var fFlag = 0;
var eFlag = 0;
var html= &#39;&#39;;
var upPageHtml =&#39;&#39;;
var downPageHtml =&#39;&#39;;

var pageCount=5;
var displayPageNum=3;
var firstPageWord = &#39;First&#39;;
var endPageWord = &#39;Last&#39;;
var upPageWord =&#39;Previous&#39;;
var downPageWord =&#39;Next&#39;;

var labelHtml = &#39;&lt;span class=&quot;showpageNum&quot;&gt;&lt;a href=&quot;/search/label/&#39;+thisLable+&#39;?&amp;max-results=&#39;+pageCount+&#39;&quot;&gt;&#39;;

for(var i=0, post; post = json.feed.entry[i]; i++) {
var timestamp = post.published.$t.substr(0,10);
var title = post.title.$t;
if(isLablePage){
if(title!=&#39;&#39;){
if(post.category){
for(var c=0, post_category; post_category = post.category[c]; c++) {
if(encodeURIComponent(post_category.term)==thisLable){
if(itemCount==0 || (itemCount % pageCount ==(pageCount-1))){
if(thisUrl.indexOf(timestamp)!=-1 ){
thisNum = postNum;
}

postNum++;
htmlMap[htmlMap.length] = &#39;/search/label/&#39;+thisLable+&#39;?updated-max=&#39;+timestamp+&#39;T00%3A00%3A00%2B08%3A00&amp;max-results=&#39;+pageCount;
}
}
}
}//end if(post.category){

itemCount++;
}

}else{
if(title!=&#39;&#39;){
if(itemCount==0 || (itemCount % pageCount ==(pageCount-1))){
if(thisUrl.indexOf(timestamp)!=-1 ){
thisNum = postNum;
}

if(title!=&#39;&#39;) postNum++;
htmlMap[htmlMap.length] = &#39;/search?updated-max=&#39;+timestamp+&#39;T00%3A00%3A00%2B08%3A00&amp;max-results=&#39;+pageCount;
}
}
itemCount++;
}
}

for(var p =0;p&lt; htmlMap.length;p++){
if(p&gt;=(thisNum-displayPageNum-1) &amp;&amp; p&lt;(thisNum+displayPageNum)){
if(fFlag ==0 &amp;&amp; p == thisNum-2){
if(thisNum==2){
if(isLablePage){
upPageHtml = labelHtml + upPageWord +&#39;&lt;/a&gt;&lt;/span&gt;&#39;;
}else{
upPageHtml = &#39;&lt;span class=&quot;showpage&quot;&gt;&lt;a href=&quot;/&quot;&gt;&#39;+ upPageWord +&#39;&lt;/a&gt;&lt;/span&gt;&#39;;
}
}else{
upPageHtml = &#39;&lt;span class=&quot;showpage&quot;&gt;&lt;a href=&quot;&#39;+htmlMap[p]+&#39;&quot;&gt;&#39;+ upPageWord +&#39;&lt;/a&gt;&lt;/span&gt;&#39;;
}

fFlag++;
}

if(p==(thisNum-1)){
html += &#39;&amp;nbsp;&lt;span class=&quot;showpagePoint&quot;&gt;&lt;u&gt;&#39;+thisNum+&#39;&lt;/u&gt;&lt;/span&gt;&#39;;
}else{
if(p==0){
if(isLablePage){
html = labelHtml+&#39;1&lt;/a&gt;&lt;/span&gt;&#39;;
}else{
html += &#39;&lt;span class=&quot;showpageNum&quot;&gt;&lt;a href=&quot;/&quot;&gt;1&lt;/a&gt;&lt;/span&gt;&#39;;
}
}else{
html += &#39;&lt;span class=&quot;showpageNum&quot;&gt;&lt;a href=&quot;&#39;+htmlMap[p]+&#39;&quot;&gt;&#39;+ (p+1) +&#39; &lt;/a&gt;&lt;/span&gt;&#39;;
}
}

if(eFlag ==0 &amp;&amp; p == thisNum){
downPageHtml = &#39;&lt;span class=&quot;showpage&quot;&gt; &lt;a href=&quot;&#39;+htmlMap[p]+&#39;&quot;&gt;&#39;+ downPageWord +&#39;&lt;/a&gt;&lt;/span&gt;&#39;;
eFlag++;
}
}//end if(p&gt;=(thisNum-displayPageNum-1) &amp;&amp; p&lt;(thisNum+displayPageNum)){
}//end for(var p =0;p&lt; htmlMap.length;p++){

if(thisNum&gt;1){
if(!isLablePage){
html = &#39;&lt;span class=&quot;showpage&quot;&gt;&lt;a href=&quot;/&quot;&gt;&#39;+ firstPageWord +&#39; &lt;/a&gt;&lt;/span&gt;&#39;+upPageHtml+&#39; &#39;+html +&#39; &#39;;
}else{
html = &#39;&#39;+labelHtml + firstPageWord +&#39; &lt;/a&gt;&lt;/span&gt;&#39;+upPageHtml+&#39; &#39;+html +&#39; &#39;;
}
}

html = &#39;&lt;div class=&quot;showpageArea&quot;&gt;&lt;span style=&quot;font-size:11px;padding: 2px 4px 2px 4px;margin: 2px 2px 2px 2px;color: #000000;border: 1px solid #333; background-color: #FFFFFF;&quot; class=&quot;showpage&quot;&gt;Page &#39;+thisNum+&#39; of &#39;+(postNum-1)+&#39;: &lt;/span&gt;&#39;+html;

if(thisNum&lt;(postNum-1)){
html += downPageHtml;
html += &#39;&lt;span class=&quot;showpage&quot;&gt;&lt;a href=&quot;&#39;+htmlMap[htmlMap.length-1]+&#39;&quot;&gt; &#39;+endPageWord+&#39;&lt;/a&gt;&lt;/span&gt;&#39;;
}

if(postNum==1) postNum++;
html += &#39;&lt;/div&gt;&#39;;

if(isPage || isFirstPage || isLablePage){
var pageArea = document.getElementsByName(&quot;pageArea&quot;);
var blogPager = document.getElementById(&quot;blog-pager&quot;);

if(postNum &lt;= 2){
html =&#39;&#39;;
}

for(var p =0;p&lt; pageArea.length;p++){
pageArea[p].innerHTML = html;
}

if(pageArea&amp;&amp;pageArea.length&gt;0){
html =&#39;&#39;;
}

if(blogPager){
blogPager.innerHTML = html;
}
}

}
&lt;/script&gt;

&lt;script src=&quot;/feeds/posts/summary?alt=json-in-script&amp;callback=showpageCount&amp;max-results=99999&quot; type=&quot;text/javascript&quot;&gt;&lt;/script&gt;

<div style='text-align:right;font-size:10px;color:000000;margin-top:15px;display:none;'> <a href='http://socheatk.blogspot.com/2008/10/page-navigation-hack-for-blogger.html'>Grab this Widget ~ Blogger Accessories</a></div>

In the code above you can edit the lines in red to your wish .

1 : var pageCount = 5;

The digit in red represents number of posts to be shown in single page. Change the digit to show as many pages you want.

for example :

In my blog I have put that value as 2 . In each page you can see only 2 posts .

2 : var displayPageNum = 3;

here the digit in red represents number of pages to be listed.

For example :

In my blog I have chosen 3 , then 3 pages will be shown.

That's it now we have added Page Navigation menu hack to our blog successfully .

That CSS code will suit almost all templates. Please don't remove the credit link.

I hope all of you will like this Page Navigation blogger hack . If you have any doubts please ask in comment section . Comments are most welcome , please give me your feedback about this blogger Hack.


Read more!

Text Codes


While inserting text in your Site, Blog or myspace..., your text must contain several styles like bold, italic, underline, and more. Formatting the text in different styles increases the readability of the page. Use heading text codes to differentiate your headings and titles from the context since your users must see the headings easily.
How to use Site, Blog or myspace... Text Codes:

The TEXT placeholder is where you enter your text.

Enter a color code where it says COLOR.

Myspace Text Codes:

There are many special effects that you can apply to your text, you can also combine effects to create cool looking text. The effects marked with * work in Internet Explorer only.

Some of these text code effects only work for Internet Explorer Browsers, the most popular browser. If you are considerate of other browsers, use the safe ones only! Incompatible browser effects are marked with a *.

Bold Your Text


Italicize Your Text


Underline
Your Text


Strikeout
Your Text


Overline Your Text


Superscript Your Text


Subscript Your Text


Italic and BoldYour Text


Italic, Bold, and UnderlineYour Text


Underline and Overline Your Text


Change Color of Your Text [color codes]


Highlight Your Text [color codes]

Change the Size of Your Text [Font Sizes:7654321]


Change The Font of Your Text [Websafe Fonts: Arial, Arial Black, Comic Sans MS, Courier New, Georgia, Impact, Times New Roman, Trebuchet MS, Verdana, Webdings]


Header 1 Text


Header 1 Text


Header 1 Text


Header 1 Text


Header 1 Text

*Glow Your Text[color codes]


*Blur Your Text


*Wave Your Text


*Shadow Your Text


*Drop Shadow Your Text


TOP LINE TEXT
BOTTOM LINE TEXT


top line text
bottom line text


top line text
bottom line text


Read more!

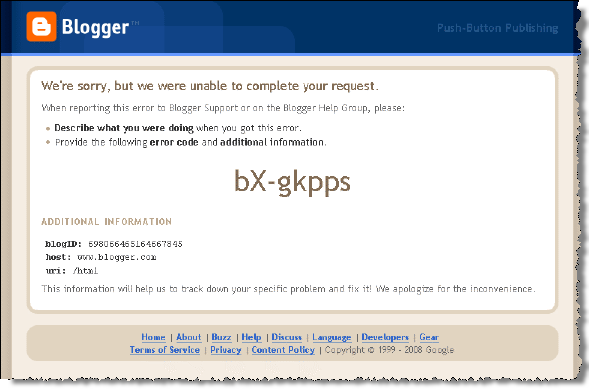
Error code bX-jdokxi - i can't change my template!


Have you ever got the error code bX-jdokxi when you try to change template?

Any of you who have tried to change Blogger templates or moved around your blog’s page elements have probably seen the dreaded Blogger “bX-xxxxxx” cryptic error message.


It’s frustrating enough to see an error message after trying to make what seems like a trivial change to your blog and how can you fix the problem if you’re given an error code instead of a actionable error message like “template is incorrect on line xx”? Blogger’s support area doesn’t even give you information on what each error means and how to resolve it so if you want their help you need to post a message and wait 12+ hours for someone at Google support to respond. You would think Google would spend some more time and resources to improve their error messages and Blogger support.

So the main question is what does the error message actually mean and how can you fix it now?


Blogger bX Error message


For me, I was able to fix it by making a few changes but there was no exact science as to how I did it.

  • Use Fire Fox rather than Internet Explorer when you're having
    trouble with a template.

  • Make a backup of the code in each of your gadgets or widgets, so
    you can put them back later, then remove all of them.

  • Before attempting to upload a template, make sure the "Expand
    Widget Template" box is UNchecked.

  • There are far less problems if you can get the template as a txt
    file rather than xml. With a txt file you can just paste it in,
    rather
    than having to upload it.

  • Install one of Blogger's templates. Then try again.If you're using an xml file, don't paste it. Save it on your harddrive, and then on the template page, use "Browse" to find it on your computer. Then click "Upload."

For the Last ways and the Best way to Fix this error you should Revert to Classic Template:

  1. Layout => Edit HTML => Revert to Classic Template

  2. Customize Design => UPGRADE YOUR TEMPLATE => SAVE TEMPLATE

  3. Layout => Edit HTML (Install with a new template).

Now I think you can change with a new template you like, without any error code.

Read more!

How to check if my blog already get index by Google?


Get you blog index by Google is really important. If you were seek for blog traffics, this is a crucial step that you need to know. This is apart of SEO technique that blogger should learn especially for the newbies out there. SEO is another way to get traffics to your blog if you do it right. But make sure you know first whether your blog has been index by google or not. So, today I would to share an article about how to check whether your blog has been indexed by google or not?

To check your blog whether Google has indexed it or not, you need to follow the simple step above. First, go to google search page. Any country google search site also work. And then, in the search form, type the keyword shown in the image below:

check-blog-index-google How to check if my blog already get index by Google?

Type that SITE:HTTP://YOURSITE.COM by replacing that yoursite.com with your own blog URL. And then click search. After that you will know whether your blog has been indexed by google or not.

Type that SITE:HTTP://YOURSITE.COM by replacing that yoursite.com with your own blog URL. And then click search. After that you will know whether your blog has been indexed by google or not.

If your blog has been index by Google, you can see some search result appear such as the below image. Thats meant that Google already index your blog.

already-index-by-google How to check if my blog already get index by Google?

And if your blog has not been indexed by google yet, you can see the following result appear when you search for your site.

not-index-by-google-yet

That meant you need to work out something to make you blog get indexed by Google. Don’t worry because I will posted another post on How To Get Your Blog index by Google Faster !!


Read more!

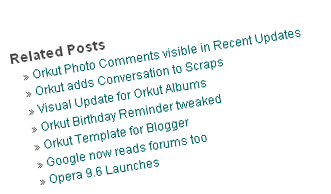
Related Posts Widget For Blogger with CSS


Related Posts Widget for blogger is what everybody is looking for, In Most of the sites we will find only javascript code and HTML tag for related posts widget. After adding the code to your blog , you can see just a list of related
posts without any arrows or style css. So i wanted to embed both in order to make the widget links looks beautiful.

Thats it , now look at the page , it will look like this

Related Posts Blogger

: search this line <p><data:post.body/></p> . (<p><data:post.body/></p> Then_the_related_posts_script_here) and paste the following script the code just below:

<b:if cond='data:blog.pageType == "item"'>
<div class='similiar'>
<!-- *****************http://hoctro.blogspot.com*****Jan,2007****************** -->
<!-- *****************Related Articles by Labels - Take Two****************** -->

<!--
Modified by JackBook.Com to make it easier to use.
1. Now, users don't need to change anything to use this widget. just copy and paste, and done!
2. The current article will also be listed, now it's no more.
-->

<div class='widget-content'>
<h3>Related Posts by Categories</h3>
<div id='data2007'/><br/><br/>
<div id='hoctro'>
You want it? <u><a href='http://www.yuljet.co.cc/2008/10/related-posts-widget-for-blogger-with.html'>Click here</a></u> | <u><a href='http://www.yuljet.co.cc/' title='Related Posts on Blogger. Read More?'>Yul Jet</a></u>
</div>
<script type='text/javascript'>

var homeUrl3 = &quot;<data:blog.homepageUrl/>&quot;;
var maxNumberOfPostsPerLabel = 4;
var maxNumberOfLabels = 10;

maxNumberOfPostsPerLabel = 100;
maxNumberOfLabels = 3;

function listEntries10(json) {
var ul = document.createElement(&#39;ul&#39;);
var maxPosts = (json.feed.entry.length &lt;= maxNumberOfPostsPerLabel) ?
json.feed.entry.length : maxNumberOfPostsPerLabel;
for (var i = 0; i &lt; maxPosts; i++) {
var entry = json.feed.entry[i];
var alturl;

for (var k = 0; k &lt; entry.link.length; k++) {
if (entry.link[k].rel == &#39;alternate&#39;) {
alturl = entry.link[k].href;
break;
}
}
var li = document.createElement(&#39;li&#39;);
var a = document.createElement(&#39;a&#39;);
a.href = alturl;

if(a.href!=location.href) {
var txt = document.createTextNode(entry.title.$t);
a.appendChild(txt);
li.appendChild(a);
ul.appendChild(li);
}
}
for (var l = 0; l &lt; json.feed.link.length; l++) {
if (json.feed.link[l].rel == &#39;alternate&#39;) {
var raw = json.feed.link[l].href;
var label = raw.substr(homeUrl3.length+13);
var k;
for (k=0; k&lt;20; k++) label = label.replace(&quot;%20&quot;, &quot; &quot;);
var txt = document.createTextNode(label);
var h = document.createElement(&#39;b&#39;);
h.appendChild(txt);
var div1 = document.createElement(&#39;div&#39;);
div1.appendChild(h);
div1.appendChild(ul);
document.getElementById(&#39;data2007&#39;).appendChild(div1);
}
}
}
function search10(query, label) {

var script = document.createElement(&#39;script&#39;);
script.setAttribute(&#39;src&#39;, query + &#39;feeds/posts/default/-/&#39;
+ label +
&#39;?alt=json-in-script&amp;callback=listEntries10&#39;);
script.setAttribute(&#39;type&#39;, &#39;text/javascript&#39;);
document.documentElement.firstChild.appendChild(script);
}

var labelArray = new Array();
var numLabel = 0;

<b:loop values='data:posts' var='post'>
<b:loop values='data:post.labels' var='label'>
textLabel = &quot;<data:label.name/>&quot;;

var test = 0;
for (var i = 0; i &lt; labelArray.length; i++)
if (labelArray[i] == textLabel) test = 1;
if (test == 0) {
labelArray.push(textLabel);
var maxLabels = (labelArray.length &lt;= maxNumberOfLabels) ?
labelArray.length : maxNumberOfLabels;
if (numLabel &lt; maxLabels) {
search10(homeUrl3, textLabel);
numLabel++;
}
}
</b:loop>
</b:loop>
</script>
</div>

</div>
</b:if>

Save your template. refresh your blog, and Done.

That’s all. Enjoy!

Note; Related Posts is a list of all posts related to some article based on the labels. And because this uses Javascript, if you want to create a list of posts related by content, it might be pretty hard to do currently.


Read more!

How do I put a picture into the caption of a picture on Website


(With Caption)នៅ​ក្រោម​លំនៅ​ឋាន​មាន​កី​តម្បាញ​សំរាប់​ត្បាញ​ហូល​ (រូបថត​ ៖​ ធា)

នៅ ក្រោម លំនៅ ឋាន មាន កី តម្បាញ សំរាប់ ត្បាញ ហូល (រូបថត ៖ ធា)


(No Caption)នៅ​ក្រោម​លំនៅ​ឋាន​មាន​កី​តម្បាញ​សំរាប់​ត្បាញ​ហូល​ (រូបថត​ ៖​ ធា)


A caption to an image on Post is a short text message that appears below the image and clarifies its import. Most captions draw attention to something in the image that is not obvious, such as its relevance to the text. For complex images or images whose relationship to the text is unclear, the caption can be one or two short sentences, rarely three. Writing good captions is difficult, and the examples below may be helpful. Along with the title, the lead, and section headings, captions are the most commonly read words in an article, so they
should be succinct and informative.

: search this line ]]></b:skin> and add this CSS code above that line.
.wp-caption {
border: 1px solid #DDDDDD;
text-align: center;
background-color: #EEEEEE;
padding: 4px 0px 5px 0px;
-moz-border-radius: 3px;
-khtml-border-radius: 3px;
-webkit-border-radius: 3px;
border-radius: 3px;
}
.wp-caption img {
margin: 0px 0px 5px 0px;
padding: 0px;
border: 0px;
}
.wp-caption p.wp-caption-text {
margin: 0px;
padding: 0px 0px 0px 0px;
font-size: 11px;
font-weight: normal;
line-height: 12px;
}

When you want to put Photo with Caption you should write like this:
<div class="wp-caption"><img src="http://women.open.org.kh/files/images/hol_phamoung.jpg" alt="" />
<p class="wp-caption-text">Khmer Dress(Photo by:sss)</p>
</div>


Read more!

How to resize image in Home Page at Magazine Template R.1.2


Kang Rohman has received complaints several times about Magazine Template R.1.2, it is about the image in home page that’s displayed with small size.
How can we resize the image in home page of magazine Template magazine R.1.2 ?
If you feel uncomfortable with the image size in home page at magazine Template R.1.2, you can resize it as follow:
Login to blogger with your ID
Click Layout
Click Edit HTML
Find this code :
.post-body img{
max-width:70px;
padding:1px;
float:left;
margin:0 5px 1px 0;
border: 1px solid #cadaef;
}

Focus to the code:
max-width:70px;

Change the pixel with the higher one, suggested to change not more than 300px, e.g.:
max-width:300px;

The code will be as below:
.post-body img{
max-width:300px;
padding:1px;
float:left;
margin:0 5px 1px 0;
border: 1px solid #cadaef;
}

Click Save template
Done
Additional Note:
Max-width means the width of image displayed. It is easy, right?
Happy trying!


Read more!


©2009 daily news | by TNB