Showing posts with label CSS code. Show all posts

Friday, June 26, 2009

Display CSS codes and Scripts in unique Style – Blogger Post Styling hack


All of you might have noticed that in my blogger posts I use a custom CSS style to show CSS codes , Scripts and other important notes. After looking at this cool features one of my reader asked me how to do this. So I am Posting this ” Post Styling Hack for blogger to display scripts and CSS codes in unique style ” .
Just Follow This steps to add this ” Post Styling Hack ” to your Blog .

Step 1 :

Login to your Blogger account and navigate to Layout section . Then go to Edit Html subtab .

No Need to Check Expand Widgets Box

Step 2 : Add This CSS code above this line ]]> .


.hint {
border : 1px solid #4ab7ff;
font-size : 11px;
color : #191919;
background : #bfe5ff url(http://i400.photobucket.com/albums/pp88/jumbledpics/info.gif) no-repeat 5px center;
font-family : Verdana, sans-serif, "Courier New";
line-height : 125%;
margin : 5px 0 0;
padding : 12px 12px 12px 40px;
display : block;
font-weight : 400;
width : 85%;
}


See Screenshot Below for Instructions :

Blogger Post Styling Hack


you can change the text in red to your wish to suit your Template.

Step 3 :

Whenever you create new posts just include the speical Script ( CSS code , Scripts , etc ) within this div section .

<div class=<hint>


Insert the Special code here


</div>


Don’t use id instead of class


that’s it you have add this post Styling hack to your blogger template celebrate .


Read more!

Saturday, June 13, 2009

HTML and JavaScript inside blogger posts using custom display boxes


It is very difficult for anyone using Blogger blogs to show HTML codes and JavaScript inside the blog posts . You might have also seen people showing the scripts in small display boxes of fixed length and width. Now after applying this Blogger trick ,
you would be able to show HTML and JavaScript inside Blogger posts with custom display boxes .


Click on layout of the blog in which want show HTML or JavaScript and now select edit HTML .

Before you apply any Blogger hack ,remember to download and save your full template.


Now tick the expand widget templates and move onto the selection shown below ( towards the end of CSS code ) .


HTML and JavaScript inside blogger posts using custom display boxes

Otherwise you can press Cntrl+F and paste ]]></b:skin> on appearing search box then enter


Paste the following CSS code above that line .


pre
{
background:#efefef;
border:1px solid #A6B0BF;
font-size:120%;
line-height:100%;
overflow:auto;
padding:10px;
color:#000000 }
pre:hover {
border:1px solid #efefef;
}
code {
font-size:120%;
text-align:left;
margin:0;padding:0;
color: #000000;}
.clear { clear:both;
overflow:hidden;
}


The above code is for drawing a display box inside the Blogger post to show HTML and JavaScript.You can change the length ,width ,size and color of the box , back ground image etc. by editing the CSS code. After adding this code you can call the display box anytime into your post by following next step.


<pre>

"your HTML or JAVA script"

</pre>


In Blogger in draft , there would be a problem with this HTML and JavaScript display box . For fixing that,


Expand Post options from the Blogger text editor ( On the bottom left corner ) . From the compose settings, select
Interpret typed HTML . Now everything would appear fine .


Before you add "your HTML or JAVA script " make it post friendly by following this link

Inside the box provided paste the script and click make it friendly

Now copy the generated code and paste between <pre> & </pre> to keep it inside display box


Making the script postable is the only requirement if you plan to show the HTML or Java Script alone , without a display box.


Like this post ?? Read how you can start a blogger custom domain

advertisementsK/p>

Read more!

Friday, May 15, 2009

CSS Float

The CSS float property enables you to determine where to position an element relative to the other elements on the page. When you use the float property, other elements will simply wrap around the element you applied the float to.


Example code:


<div style="width:300px;">
<h1 style="float:left; margin:0 10px 10px 0;cursor:pointer; cursor:hand;">CSS float</h1>
<p>If your browser supports the CSS float Property, this text will be flowing around the heading.
If this does not seem to work, it could be a browser compatibility thing...</p>

</div>


This results in:


CSS float


If your browser supports the CSS float Property, this text will be flowing around the heading. If this does not seem to work, it could be a browser compatibility thing...


Read more!

CSS Positioning

The term "CSS positioning" refers to using CSS to position elements on your HTML page. CSS allows you to position any element precisely where you want it. You can specify whether you want the element positioned relative to its natural position in the page or absolute based on its parent element.


Absolute positioning can be very useful for creating advanced layouts and cool visual effects such as overlapping elements to present a layered effect.


Relative Positioning


To perform relative positioning in CSS you use position:relative; followed by the desired offset from either top, right, bottom or left


<div style="position:relative;left:80px;background-color:yellow;">
This div has relative positioning.
</div>


This results in:


This div has relative positioning.


This example offsets the element 80 pixels from the left of where it would have been. If we had specified top, it would appear 80 pixels below where it would have been. It's important to note that other elements are not affected by this element's offset. Therefore, overlapping may occur.


Absolute Positioning


To perform absolute positioning in CSS you use position:absolute; followed by the desired offset.


<div style="position:absolute;top:100px;left:60px;background-color:yellow;">

This div is absolutely positioned 100 pixels from the top and 60 pixels from the left of its containing block.
</div>


View the result


Fixed Positioning


Fixed positioning allows you to fix the position of an element to a particular spot on the page - regardless of scrolling.


<div style="position:fixed;top:100px;left:60px;width:180px;background-color:red;">

This div is using a fixed position of 100 pixels from the top and 60 pixels from the left of its containing block.
When this page scrolls, this box will remain in a fixed position - it won't scroll with the rest of the page.
Go on - SCROLL!
</div>


Read more!

CSS Height and Width

CSS includes height and width properties to help you specify the size of your elements.


'height' and 'width' Properties


Applies to all HTML elements except non-replaced inline elements, table columns and column groups.


Can use a fixed height (i.e. pixels) or a percentage height.


<div style="background-color:orange;height:125px;width:75px;">

This div has height and width applied.
</div>


This results in:


This div has height and width applied.


'max-height' and 'max-width' Properties


Enables you to constrain the height and/or width of an element to a maximum value.


<div style="background-color:orange;max-height:125px;max-width:75px;">
This div has max-height and max-width applied.
</div>


This results in:


This div has max-height and max-width applied.


'min-height' and 'min-width' Properties


Enables you to constrain the height and/or width of an element to a minimum value.


<div style="background-color:orange;min-height:125px;min-width:75px;">
This div has min-height and min-width applied.
</div>


This results in:


This div has min-height and min-width applied.


Read more!

CSS Lists

CSS includes a number of list properties to help you style your HTML lists.


List Style Type


Determines what the bullet looks like. For info on the possible values see the list-style-type page.


<ul style="list-style-type:circle;">

<li>List item one</li>
<li>List item two</li>
</ul>


This results in:


  • List item one

  • List item two


List Style Image


<ul style="list-style-image:url(https://blogger.googleusercontent.com/img/b/R29vZ2xl/AVvXsEhUjbS8__BqVuluXEgf0jj4sWgP7WwfZ6ZxKErN2N4gAX7hNBieZTXFxwMwVXqa9tr9lXBaKCdODbrmJzf76QY0nAAQTgssgH8rHzfO31Ff_hDOXWo506f8HO9uICTs67HMZpyxaA5Zapg/?imgmax=800);">
<li>List item one</li>

<li>List item two</li>
</ul>


This results in:


  • List item one

  • List item two


List Style Position


Determines whether the bullet is located inside the list's containing box or outside.


<ul style="list-style-position:inside;">
<li>List item one</li>

<li>List item two</li>
</ul>
<ul style="list-style-position:outside;">
<li>List item one</li>
<li>List item two</li>

</ul>


This results in:


  • List item one

  • List item two


  • List item one


  • List item two


List Style


The list-style property is shorthand for setting the list properties.


<ul style="list-style:square inside;">
<li>List item one</li>

<li>List item two</li>
</ul>


This results in:


  • List item one

  • List item two


Marker Offset


Used in conjunction with display:marker, marker-offset specifies the nearest border edges of the marker box and its associated principal box.


<ul>
<li style="display:marker;marker-offset:10px;">List item one</li>

<li>List item two</li>
</ul>


This results in:


  • List item one

  • List item two


At the time of writing, browser support for marker-offset was limited.


Read more!

CSS Padding

Padding defines the space between the element's border and its content. CSS padding is specified just like margins - they can be set individually for each side, or all sides at once.


Setting Padding on all Sides


<p style="border:1px solid orange;padding:20px;">
This text has padding of 20 pixels on all four sides.
</p>


This results in:


This text has padding of 20 pixels on all four sides.


Setting Padding for Each Side


If you don't want the padding settings to be applied to all four sides, or if you want each side to have different padding, you can use the following properties:


  • padding-bottom


  • padding-left

  • padding-right

  • padding-top


Example:


<p style="border:1px solid orange;padding-left:60px;">This text has left padding of 60 pixels.</p>


This results in:


This text has left padding of 60 pixels.


Read more!

CSS Background Code

Apart from the various CSS font properties, there are other properties that can assist in styling your text. For example, you can change the color of text, align text, add decoration properties and more.


In CSS, text can be styled using the properties listed below. Using this list, you can learn how to use each css text property and what it looks like in a browser.


The following CSS background codes demonstrate the various CSS properties you can use to style the background of any HTML element.


CSS Background Color


<p style="background-color:yellow;">This text has a background color applied.</p>


This results in:


This text has a background color applied.


CSS Background Image


<p style="height:100px;background-image:url(http://2.bp.blogspot.com/_jsh8ETlAeWg/SMLZw2n-LHI/AAAAAAAAAFY/dH2eeWZn8A0/S75/mylogo.gif);">This text has a background image applied. </p>


This results in:


This text has a background image applied.


CSS Background Repeat


Determines whether the background image repeats (tiles) or not. For info on the possible values, see the background-repeat page.


<p style="height:100px;background-image:url(http://2.bp.blogspot.com/_jsh8ETlAeWg/SMLZw2n-LHI/AAAAAAAAAFY/dH2eeWZn8A0/S75/mylogo.gif);background-repeat:no-repeat;">This background image does not repeat. </p>


This results in:


This background image does not repeat.


CSS Background Position


Determines the position of the background image.


<p style="height:100px;background-image:url(http://2.bp.blogspot.com/_jsh8ETlAeWg/SMLZw2n-LHI/AAAAAAAAAFY/dH2eeWZn8A0/S75/mylogo.gif);background-repeat:no-repeat;background-position:100px;">This background image is positioned 100 pixels in from the left. </p>


This results in:


This background image is positioned 100 pixels in from the left.


CSS Background Attachment


Determines whether or not the background image scrolls with the outer container.


<p style="height:100px;width:150px;overflow:scroll;background-image:url(http://2.bp.blogspot.com/_jsh8ETlAeWg/SMLZw2n-LHI/AAAAAAAAAFY/dH2eeWZn8A0/S75/mylogo.gif);background-attachment:fixed;">This background image is fixed - it doesn't scroll with its outer container. This example uses the CSS overflow property to force the box to scroll when there's too much text to fit in the box. </p>


This results in:


This background image is fixed - it doesn't scroll with its outer container. This example uses the CSS overflow property to force the box to scroll when there's too much text to fit in the box.


Shorthand Code


You can use the background property to set all the background properties at once. For example:


<p style="height:100px;width:150px;overflow:scroll;background:url(http://2.bp.blogspot.com/_jsh8ETlAeWg/SMLZw2n-LHI/AAAAAAAAAFY/dH2eeWZn8A0/S75/mylogo.gif) repeat fixed;">This paragraph tag has been styled using the 'background' property, which is shorthand for setting multiple properties for an HTML element. </p>


This results in:


This paragraph tag has been styled using the 'background' property, which is shorthand for setting multiple properties for an HTML element.


Read more!

CSS Text

Apart from the various CSS font properties, there are other properties that can assist in styling your text. For example, you can change the color of text, align text, add decoration properties and more.


In CSS, text can be styled using the properties listed below. Using this list, you can learn how to use each css text property and what it looks like in a browser.


CSS Text Color


<p style="color:olive;">This CSS text color is olive</p>


This results in:


This CSS text color is olive


CSS Text Align


<p style="text-align:right;">This CSS text is aligned right</p>


This results in:


This CSS text is aligned right


CSS Text Indent


Indents the first line of the paragraph.


<p style="text-indent:50px;">This text is indented by 50 pixels. What this means is that the first line of the paragraph will be indented by 50 pixels, but the following lines will not be indented. The text will need to wrap before you can see the indent - hence all this text!</p>


This results in:


This text is indented by 50 pixels. What this means is that the first line of the paragraph will be indented by 50 pixels, but the following lines will not be indented. The text will need to wrap before you can see the indent - hence all this text!


CSS Letter Spacing


<p style="letter-spacing:5px;">This text has letter spacing applied</p>


This results in:


This text has letter spacing applied


CSS Word Spacing


<p style="word-spacing:50px;">This text has word spacing applied</p>


This results in:


This text has word spacing applied


CSS Text Decoration


<p style="text-decoration:overline;">This text has a line over the top</p>

<p style="text-decoration:line-through;">This text has a line through the middle</p>
<p style="text-decoration:underline;">This text has a line underneath</p>
<a style="text-decoration:none;" a href="/css/properties/css_text-decoration.cfm" >
This hyperlink has no underline</a>
<p style="text-decoration:blink;">This text is blinking</p>


This results in:


This text has a line over the top


This text has a line through the middle


This text has a line underneath


This hyperlink has no underline

This text is blinking


CSS Text Transform


<p style="text-transform:uppercase;">This text has been transformed to uppercase</p>
<p style="text-transform:lowercase;">THIS TEXT HAS BEEN TRANSFORMED TO LOWERCASE</p>
<p style="text-transform:capitalize;">this text has been capitalized.</p>


This results in:


This text has been transformed to uppercase


THIS TEXT HAS BEEN TRANSFORMED TO LOWERCASE


this text has been capitalized.


CSS Text Direction


<p style="direction:rtl;">This text is running from right to left. This can be useful for languages where the text runs from right to left. Not so useful for english though...</p>


This results in:


This text is running from right to left. This can be useful for languages where the text runs from right to left. Not so useful for english though...


CSS unicode-bidi


Use this in conjunction with the direction property to determine the direction of the text. Possible values: normal, embed, bidi-override, and inherit.


<p style="direction:rtl;unicode-bidi:bidi-override;">This text is running from right to left. This can be useful for languages where the text runs from right to left. Not so useful for english though...</p>


This results in:


This text is running from right to left. This can be useful for languages where the text runs from right to left. Not so useful for english though...


CSS Text Shadow


<p style="text-shadow:4px 4px 8px blue;">If your browser supports the CSS text-shadow property, this text will have a shadow.</p>


This results in:


If your browser supports the CSS text-shadow property, this text will have a shadow.


CSS White Space


Tells the browser how to handle white space. Possible values: normal, pre, and nowrap.


<p style="white-space:pre;">This text has a line break
and the white-space pre setting tells the browser to honor it
just like the HTML pre tag.</p>


This results in:


This text has a line break
and the white-space pre setting tells the browser to honor it
just like the HTML pre tag.



Read more!

CSS Font

CSS font properties enable you to change the look of your text. For example, you can assign a font family, apply bold or italic formatting, change the size and more.


CSS Font Family


<p style="font-family:georgia,garamond,serif;">This text is rendered in either georgia, garamond, or the default serif font (depending on which font the user's system has).</p>


This results in:


This text is rendered in either georgia, garamond, or the default serif font (depending on which font the user's system has).


CSS Font Size


Enables you to set the size of the text. For info on the possible values, see the CSS font-size page.


<p style="font-size:20px;">This text is using a font size of 20 pixels.</p>


This results in:


This text is using a font size of 20 pixels.


CSS Font Size Adjust


This property enables you to adjust the x-height to make fonts more legible. For more info, see the font-size-adjust page.


<p style="font-size-adjust:0.58;">This text is using a font-size-adjust value.</p>


This results in:


This text is using a font-size-adjust value.


CSS Font Stretch


This property relies on the user's computer to have an expanded or condensed version of the font being used. For all possible values, see the font-stretch page.


<p style="font-stretch:ultra-expanded;">If your computer has an expanded version of the font being used, this text will be stretched.</p>


This results in:


If your computer has an expanded version of the font being used, this text will be stretched.


CSS Font Style


<p style="font-style:italic;">This text is in italics.</p>


This results in:


This text is in italics.


CSS Font Variant


Enables you to set your text to use small caps.


<p style="font-variant:small-caps;">This Text Is Using Small Caps.</p>


This results in:


This Text Is Using Small Caps.


CSS Font Weight


Enables you to set your text to bold.


<p style="font-weight:bold;">This text is bold.</p>


This results in:


This text is bold.


CSS Font Property


The font property is a shorthand property that enables you to set all font properties in one go.


<p style="font:italic small-caps bold 20px georgia,garamond,serif;">The styles for this text has been specified with the 'font' shorthand property.</p>


This results in:


The styles for this text has been specified with the 'font' shorthand property.


Read more!

CSS ID

IDs allow you to assign a unique identifier to an HTML element. This allows you to define a style that can only be used by the element you assign the ID to.


CSS ID Syntax


The syntax for declaring a CSS ID is the same as for classes - except that instead of using a dot, you use a hash (#).


#id-name { property:value; }


Again, similar to classes, if you want to use the same id name for multiple elements, but each with a different style, you can prefix the hash with the HTML element name.


html-element-name#id-name { property:value; }


CSS ID Example


<head>
<style type="text/css">
h1#css-section { color:#000099 }
p#css-section { color:#999999; }
</style>
</head>
<body>
<h1 id="css-section">CSS ID</h1>
<p id="css-section">CSS IDs can be very useful</p>

</body>


This results in:


CSS ID


CSS IDs can be very useful


IDs vs Classes


Given classes and IDs are very similar, you may be wondering which one to use. This depends on the situation.


When to use classes


You should use classes when your style needs to be applied multiple times on the same page. For example, you might have many h1 elements that need the same style applied.


When to use IDs


You should use IDs if only one element on the page should have the style applied, and/or you need a unique identifier for that element. For example, you might assign an ID to a div tag which contains your left menu. The styles for this ID could contain the position, background-color, float properties, size etc. You probably wouldn't want any other element on the page to use this particular style.


Another useful thing about IDs is that you can use the Document Object Model (DOM) to refer to them. This enables you to use JavaScript/DHTML techniques to build a much more interactive web site.


Read more!

CSS Margin

The following CSS margin codes demonstrate the various CSS properties you can use to apply styles to the border of any HTML element.


Margins define the space around the element. CSS margins are specified in a similar way to borders - they can be set individually for each side, or all sides at once.


Setting Margins on all Sides


<div style="border:1px solid blue;">
<p style="border:1px solid orange;margin:20px;">

This text has a margin of 20 pixels on all four sides.
It is nested within a div with a border to make it easier to see the effect of the margin.
</p>
</div>


This results in:


This text has a margin of 20 pixels on all four sides. It is nested within a div with a border to make it easier to see the effect of the margin.


Setting Margins for Each Side


If you don't want the margin settings to be applied to all four sides, or if you want each side to have different margins applied, you can use the following properties:


  • margin-bottom

  • margin-left

  • margin-right

  • margin-top


Example:


<p style="border:1px solid orange;margin-left:60px;">This text has a left margin of 60 pixels.</p>


This results in:


This text has a left margin of 60 pixels.


Read more!

CSS Layers

In CSS, layers refer to applying the z-index property to elements that overlap with each other.


The z-index property, when used in conjunction with the position property, enables you to specify which element should appear on top in the event of an overlap. An overlap can easily occur when using the position property, and this is often desirable when creating advanced layouts.


Example code:


<div style="background-color:red;
width:100px;
height:100px;
position:relative;
top:10px;
left:80px;
z-index:2;">

</div>
<div style="background-color:yellow;
width:100px;
height:100px;
position:relative;
top:-60px;
left:35px;
z-index:1;">
</div>


This results in:


ddd

ddd


Read more!

Sunday, October 12, 2008

Related Posts Widget For Blogger with CSS

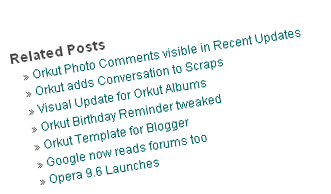
Related Posts Widget for blogger is what everybody is looking for, In Most of the sites we will find only javascript code and HTML tag for related posts widget. After adding the code to your blog , you can see just a list of related posts without any arrows or style css. So i wanted to embed both in order to make the widget links looks beautiful.

Thats it , now look at the page , it will look like this

Related Posts Blogger

: search this line <p><data:post.body/></p> . (<p><data:post.body/></p> Then_the_related_posts_script_here) and paste the following script the code just below:
<b:if cond='data:blog.pageType == "item"'>
<div class='similiar'>
<!-- *****************http://hoctro.blogspot.com*****Jan,2007****************** -->
<!-- *****************Related Articles by Labels - Take Two****************** -->

<!--
Modified by JackBook.Com to make it easier to use.
1. Now, users don't need to change anything to use this widget. just copy and paste, and done!
2. The current article will also be listed, now it's no more.
-->

<div class='widget-content'>
<h3>Related Posts by Categories</h3>
<div id='data2007'/><br/><br/>
<div id='hoctro'>
You want it? <u><a href='http://yuljet.blogspot.com/2008/10/related-posts-widget-for-blogger-with.html'>Click here</a></u> | <u><a href='http://www.yuljet.blogspot.com/' title='Related Posts on Blogger. Read More?'>Yul Jet</a></u>
</div>
<script type='text/javascript'>

var homeUrl3 = &quot;<data:blog.homepageUrl/>&quot;;
var maxNumberOfPostsPerLabel = 4;
var maxNumberOfLabels = 10;

maxNumberOfPostsPerLabel = 100;
maxNumberOfLabels = 3;

function listEntries10(json) {
var ul = document.createElement(&#39;ul&#39;);
var maxPosts = (json.feed.entry.length &lt;= maxNumberOfPostsPerLabel) ?
json.feed.entry.length : maxNumberOfPostsPerLabel;
for (var i = 0; i &lt; maxPosts; i++) {
var entry = json.feed.entry[i];
var alturl;

for (var k = 0; k &lt; entry.link.length; k++) {
if (entry.link[k].rel == &#39;alternate&#39;) {
alturl = entry.link[k].href;
break;
}
}
var li = document.createElement(&#39;li&#39;);
var a = document.createElement(&#39;a&#39;);
a.href = alturl;

if(a.href!=location.href) {
var txt = document.createTextNode(entry.title.$t);
a.appendChild(txt);
li.appendChild(a);
ul.appendChild(li);
}
}
for (var l = 0; l &lt; json.feed.link.length; l++) {
if (json.feed.link[l].rel == &#39;alternate&#39;) {
var raw = json.feed.link[l].href;
var label = raw.substr(homeUrl3.length+13);
var k;
for (k=0; k&lt;20; k++) label = label.replace(&quot;%20&quot;, &quot; &quot;);
var txt = document.createTextNode(label);
var h = document.createElement(&#39;b&#39;);
h.appendChild(txt);
var div1 = document.createElement(&#39;div&#39;);
div1.appendChild(h);
div1.appendChild(ul);
document.getElementById(&#39;data2007&#39;).appendChild(div1);
}
}
}
function search10(query, label) {

var script = document.createElement(&#39;script&#39;);
script.setAttribute(&#39;src&#39;, query + &#39;feeds/posts/default/-/&#39;
+ label +
&#39;?alt=json-in-script&amp;callback=listEntries10&#39;);
script.setAttribute(&#39;type&#39;, &#39;text/javascript&#39;);
document.documentElement.firstChild.appendChild(script);
}

var labelArray = new Array();
var numLabel = 0;

<b:loop values='data:posts' var='post'>
<b:loop values='data:post.labels' var='label'>
textLabel = &quot;<data:label.name/>&quot;;

var test = 0;
for (var i = 0; i &lt; labelArray.length; i++)
if (labelArray[i] == textLabel) test = 1;
if (test == 0) {
labelArray.push(textLabel);
var maxLabels = (labelArray.length &lt;= maxNumberOfLabels) ?
labelArray.length : maxNumberOfLabels;
if (numLabel &lt; maxLabels) {
search10(homeUrl3, textLabel);
numLabel++;
}
}
</b:loop>
</b:loop>
</script>
</div>

</div>
</b:if>


Save your template. refresh your blog, and Done.

That’s all. Enjoy!

Note; Related Posts is a list of all posts related to some article based on the labels. And because this uses Javascript, if you want to create a list of posts related by content, it might be pretty hard to do currently.

Read more!

Saturday, October 4, 2008

Text Codes

While inserting text in your Site, Blog or myspace..., your text must contain several styles like bold, italic, underline, and more. Formatting the text in different styles increases the readability of the page. Use heading text codes to differentiate your headings and titles from the context since your users must see the headings easily.


How to use Site, Blog or myspace... Text Codes:


The TEXT placeholder is where you enter your text.


Enter a color code where it says COLOR.


Myspace Text Codes:


There are many special effects that you can apply to your text, you can also combine effects to create cool looking text. The effects marked with * work in Internet Explorer only.


Some of these text code effects only work for Internet Explorer Browsers, the most popular browser. If you are considerate of other browsers, use the safe ones only! Incompatible browser effects are marked with a *.


Bold Your Text


Italicize Your Text


Underline
Your Text


Strikeout
Your Text


Overline Your Text


Superscript Your Text


Subscript Your Text


Italic and BoldYour Text


Italic, Bold, and UnderlineYour Text


Underline and Overline Your Text


Change Color of Your Text [color codes]


Highlight Your Text [color codes]

Change the Size of Your Text [Font Sizes:7654321]


Change The Font of Your Text [Websafe Fonts: Arial, Arial Black, Comic Sans MS, Courier New, Georgia, Impact, Times New Roman, Trebuchet MS, Verdana, Webdings]

Header 1 Text

Header 1 Text

Header 1 Text

Header 1 Text

Header 1 Text

*Glow Your Text[color codes]

*Blur Your Text

*Wave Your Text

*Shadow Your Text

*Drop Shadow Your Text


TOP LINE TEXT
BOTTOM LINE TEXT

top line text
bottom line text


top line text
bottom line text

Read more!


©2009 daily news | by TNB